Project 2: Balancebeam
Networked services are everywhere, and keeping them running is a critical task: communications, credit card processing, the power grid, and much more all depend on networking infrastructure. Load balancers are a crucial component for providing scalability and availability to networked services, and in this assignment, you’ll feel out the internals of a load balancer and learn what makes them tick!
This project will give you practice with multithreading, asynchronous programming, and performance optimization. Conceptually, there is a lot of overlap between this assignment and the CS 110 proxy assignment (which is the last assignment this quarter), so you’ll get a good chance to compare and contrast similar C++ and Rust code. At the same time, you’ll find the goals of this project to be quite different from the CS 110 proxy, and you’ll get experience making open-ended design decisions and measuring the performance results. We hope you enjoy working on this and are able to reflect on how much you’ve learned this quarter!
Logistics
This project is due on Wednesday, June 10 at 11:59PM pacific time. If you might have difficulty meeting that deadline, please contact us ahead of time and we can give you an extension.
Note: We will accept submissions until Saturday, June 13 at 11:59PM with no penalty. Please see our announcement here. We hope you and your families are safe.
You may work with a partner if you would like. You can find partners in the #project-2 partner thread on Slack.
This project is more open-ended than previous assignments in this class, and you will find that there are many ways to implement each task. You are welcome (and encouraged) to discuss your implementation strategies on Slack.
Also, if you would be interested in working on a different project, let us know! This is a small class and we would love to support your individual interests.
Working with a partner
If you work with a partner, only one person should submit. You should add a
comment to the top of main.rs including both partners’ names and sunet IDs
(Stanford usernames). Message us on Slack and we can add your partner to your
Github repository (or vice versa).
We strongly, strongly recommend that you do not simply split up the milestones below, but rather work together through all the work. This project is sufficiently complex that both of you need to understand all the parts involved, and we think you will benefit the most if you work closely with your partner to figure out how to solve problems and structure your code instead of working separately. If at all possible, try working together synchronously over an audio or video call.
Git is the industry-standard tool for collaborating on a codebase. Using it to collaborate is more difficult than using it as a sole developer (you’ll need to learn how to avoid and resolve merge conflicts when two people edit the same code at the same time). However, if you take time to learn how to use git properly, that experience will benefit you for years to come! Again, message us and we can add your partner to your Github repository (or vice versa).
However, git is mostly oriented for teams where people are working on different
parts of a codebase. Using it to collaborate on the same parts of the code at
the same time can be difficult, because doing so creates merge conflicts (you
edit a file, your partner edits the same file, and then you try to sync your
changes and git doesn’t know what to do with the two sets of changes). From
my experience, the best way to collaborate synchronously is to use an editor
plugin that implements Google Docs-style sharing. Here are some that I found
from a quick Google search:
- VSCode: Live Share looks really, really awesome.
- Floobits has plugins for IntelliJ, Sublime, Atom, and others. You can get free private workspaces by using an education account.
- CodeTogether is one I haven’t heard of before, but they’re offering all features for free during the COVID-19 pandemic. May be worth checking out if you don’t like the other options.
- TeamHub looks similar, but it looks like it’s in beta and you’d need to request an invite.
Tips for working with git
- A merge conflict happens when two people change the same part of a file (e.g.
the same function). It won’t happen if you make a change at the top of file A
and your partner makes a change at the bottom of file A. If possible,
coordinate changes with your partner so that you aren’t touching the same
code at the same time.
- That said, if a merge conflict happens, it’s not the end of the world. Merge conflicts are common, and there are great tools built for resolving them.
- Make frequent, small commits. A gigantic commit is very likely to create merge conflicts! Also, if you break something, it’s easier to go back and fix it if you’ve been making incremental commits along the way. You can always merge small commits into bigger ones, but you can’t easily split large commits into smaller ones.
- Write good commit messages. Not only will this help your partner understand the changes you made, but it will also help in resolving merge conflicts, since you can more quickly understand what changes are conflicting. Here’s an article about commit message style.
- Push and pull often. It’s always a nightmare when two people independently make a large number of changes, then attempt to push and are forced to resolve a stack of 15 commits.
- Say you have made some commits, and your partner just pushed their commits to
the server. You won’t be able to push your commits until you pull their
commits and reconcile them with your changes. If you run
git pull,gitwill download their commits and attempt to merge them with yours. If successful, it will commit a new “merge commit” that merges the two sets of changes. However, if you do this often, your git history will end up cluttered with merge commits. I prefer to rungit pull --rebase, which downloads your partner’s changes, then re-commits your changes on top of them. It avoids creating merge commits in the history. - Branches are a useful feature of git that allow contributors to establish separate “threads of development” in a codebase. However, since this project is small and since the milestones should be completed in order, we recommend against using branches here. If you’re curious (you will inevitably encounter branches in the future), this article gives a good summary, and this website has a great interactive visualization of how branches work.
Getting set up
The starter code is available on GitHub here.
Unlike the last project, you can work on this project directly on your computer
without any tools like Docker. If you would like to work on myth or rice,
you are certainly welcome to.
Throughout this project, please take notes on your experience: What did you try? What worked? What didn’t? We’ll ask you to write a reflection at the end of the assignment.
Milestone 0: Read the starter code
The starter code implements a single-threaded reverse proxy. (We considered having you implement it, but wanted to give you time to focus on the more interesting parts, and you’ll be implementing a proxy in CS 110 anyways.) If you’re running the code locally, you can take it for a spin. Start the load balancer like so:
cargo run -- --upstream 171.67.215.200:80
Then, visit
http://localhost:1100/class/cs110l/ in
your web browser. (This will be harder to do if you are running the server on
myth or rice, but fear not; there are many other ways to test the server
that will be described in this handout.)
This is configuring the load balancer to forward requests to a single upstream
server (the server operating web.stanford.edu). When your browser opens a
connection to balancebeam, balancebeam opens a connection to
web.stanford.edu; then, when your browser sends requests over the connection,
balancebeam passes them along, and when web.stanford.edu sends responses,
balancebeam relays them to your browser.
Let’s have a look at the code that implements this, starting in main.rs. You
should be sure to understand the code in main.rs thoroughly, as you will be
making substantial changes over the course of the assignment.
The CmdOptions struct uses some fancy macros to do command-line argument
parsing. Any command-line arguments supplied to the program end up in this
struct in main():
// Parse the command line arguments passed to this program
let options = CmdOptions::parse();
if options.upstream.len() < 1 {
    log::error!("At least one upstream server must be specified using the --upstream option.");
    std::process::exit(1);
}
The ProxyState struct is useful for storing information about the state of
balancebeam. Currently, it only stores information pulled directly from
CmdOptions, but in later milestones, you will want to add more fields to this
struct so that different threads can more easily share information.
/// Contains information about the state of balancebeam (e.g. what servers we are currently proxying
/// to, what servers have failed, rate limiting counts, etc.)
///
/// You should add fields to this struct in later milestones.
struct ProxyState {
    /// How frequently we check whether upstream servers are alive (Milestone 4)
    #[allow(dead_code)]
    active_health_check_interval: usize,
    /// Where we should send requests when doing active health checks (Milestone 4)
    #[allow(dead_code)]
    active_health_check_path: String,
    /// Maximum number of requests an individual IP can make in a minute (Milestone 5)
    #[allow(dead_code)]
    max_requests_per_minute: usize,
    /// Addresses of servers that we are proxying to
    upstream_addresses: Vec<String>,
}
After parsing the command line arguments, main() creates a server socket so
that it can begin listening for connections:
let listener = match TcpListener::bind(&options.bind) {
    Ok(listener) => listener,
    Err(err) => {
        log::error!("Could not bind to {}: {}", options.bind, err);
        std::process::exit(1);
    }
};
log::info!("Listening for requests on {}", options.bind);
Then, as connections come in, it calls the handle_connection() function,
passing a TcpStream
(“client socket” in CS 110 terms – an “internet pipe” connected to the
client).
for stream in listener.incoming() {
    let stream = stream.unwrap();
    // Handle the connection!
    handle_connection(stream, &state);
}
The handle_connection is a little long, but it is not too conceptually
complex:
- First, it selects a random upstream server and opens a connection to that server. (If the server is dead, it informs the client with a 502 Bad Gateway error.)
- Then, it begins infinitely looping, trying to read requests from the client. The client may send any number of requests over a single connection, and balancebeam is expected to relay each of them to the upstream server. There is some error handling in case the client sends a malformed request.
- Once the request has been read, balancebeam adds an X-Forwarded-For HTTP header so that the upstream server can know the client’s IP address. (This isn’t particularly important to understand; it’s simply a de-facto standard header.)
- Next, balancebeam relays the request to the upstream server. If there is an error in transmitting the request, it informs the client.
- Next, balancebeam tries to read the response from the upstream server. If the response is corrupt or there is some other problem in receiving it, it informs the client.
- Finally, balancebeam forwards the response to the client.
Throughout this code, you may see calls like log::debug! or log::info!.
This is effectively just printing to the terminal, but it is also colorizing
the output to make it easier to differentiate important log lines (e.g. errors)
from less important log lines (e.g. lines just helpful for debugging if
something goes wrong). You may continue using print! if you like, but the
logger is available for your convenience. The log levels are log::debug!,
log::info!, log::warn!, and log::error!.
request.rs and response.rs
Frustratingly, we discovered Rust does not have many crates for parsing HTTP
requests and responses. The crates that are available are either too high-level
(implementing major functionality that we want you to implement for this
assignment) or too low-level (requiring a lot of extra code to use). We ended
up using two libraries. httparse
is a low-level library that does HTTP parsing but requires a lot of extra code
to be functional. http is a library that
provides
Request and
Response
structs that can be used to store HTTP requests/responses, but does not
actually provide any code to create these objects by parsing data or to send
stored requests/responses by serializing these structs to a TcpStream. (It
doesn’t even have a toString function!) We ended up writing a lot of glue
code to combine these two libraries, and this code is provided for you in
request.rs and response.rs.
Notably, request.rs and response.rs export read_from_stream functions to
read and parse http::Request and http::Response objects from the bytes sent
by the client or server, along with write_to_stream functions to serialize
http::Request or http::Response and send that to the client or server.
These functions each first call read_headers, which reads bytes from the
client and tries to see whether the bytes received so far form a valid HTTP
request up until the end of the headers, as well as read_body, which reads
bytes from the client until we have finished reading the full body for a
request.
response.rs also provides a make_http_error function that generates an
http::Response with the provided HTTP status code. If you want to send an
error to the client, you can call this function to create an http::Response,
then use response::write_to_stream to send it to the client.
These files are more complicated to follow than main.rs, as they rely on an
understanding of the HTTP protocol, but we have tried to add comments in the
right places to make them easier to read. You don’t need to understand them in
depth. You will be modifying some of the functions in Milestone 2, but we will
walk you through the process.
Testing
We have provided a full test suite so that you do not need to run balancebeam with an upstream server and figure out how to send HTTP requests yourself. The following tests should pass out of the box:
cargo test --test 01_single_upstream_tests
cargo test --test 02_multiple_upstream_tests test_load_distribution
As you work on later milestones, you should make sure that these tests continue
to pass. We have tried to add good logging in the tests so that you can figure
out what a failing test is trying to do, but if you want to see the source code
for the tests, you can find it in the tests/ directory.
Additionally, we have set up some infrastructure that runs performance tests on your implementations so that you can get a sense for the performance impacts your design decisions have. Every time you commit and push your code (don’t forget to push), balancebench will spin up a cluster of servers and run performance tests on your balancebeam implementation. It will send you a Slack message with a link to see the performance history across your git commits. We hope this is helpful for providing a dimension to your design thinking beyond a simple “it works!". You’ll find that subtly different design decisions can have a huge impact on the performance and scalability of your server, and we hope you’ll see that through the benchmark results.
You can see everyone’s results on the leaderboard here. Everyone’s repository is anonymized under a randomly-generated name (you’ll need the link from the Slackbot in order to see commit history and detailed results). If you would like to change your name, let us know and we can customize that for you!
At the top of the leaderboard, you’ll see Nginx, which is a popular open-source web server and load balancer. Nginx was one of the first mainstream web servers to start using nonblocking I/O, as it was designed to solve the “C10K problem” in the early 2000s (how do you build a web server that can handle 10k concurrent connections?). We don’t expect anyone to beat Nginx’s performance (we will be quite surprised if this happens), but we wanted to provide a reference for the kind of performance a production server achieves.
Milestone 1: Add multithreading
Your first task is to improve balancebeam’s performance by using multithreading. You may do this however you like:
- You could modify
main()to handle each connection in a separate thread. - You could use a ThreadPool to reuse threads between requests
- Got any other ideas?
Each of these approaches has different performance tradeoffs. Which approach will work better? Try them out and see what happens on balancebench!
In doing this, you will need to think about the information you are sharing
between threads. You will need to ensure that the ProxyState struct can be
safely shared. You may not need to use any mutexes or channels if you are not
modifying data, but you are welcome to think ahead about how you might want to
use these when you implement Milestone 3.
At the end of this milestone, make sure that balancebeam is still working for distributing requests:
cargo test --test 01_single_upstream_tests
cargo test --test 02_multiple_upstream_tests test_load_distribution
Milestone 2: Use asynchronous I/O
Note: If you’re on top of things and are getting to this before Thursday’s lecture, you are welcome to go onto the next milestones and come back to this later.
Once you have multithreading working, it’s time to take a stab at using nonblocking tasks instead. We’d like for you to contrast between multithreaded and asynchronous code – and performance!
In this milestone, you should convert the codebase to use nonblocking I/O and lightweight Tokio tasks instead of threads. In many other languages, this would be a monumental task, but we think you will be pleasantly surprised at how easy it is when using Tokio and async/await syntax!
In request.rs and response.rs, you should convert std::net::TcpStream to
tokio::net::TcpStream and std::io::{Read, Write} to
tokio::io::{AsyncReadExt, AsyncWriteExt}. Then, you’ll need to update
read_headers, read_body, read_from_stream, and write_to_stream, as
these are the functions that contain blocking I/O operations. Convert each of
those functions to an async function. When calling TcpStream::read and
TcpStream::write, add .await at the end of each read or write call. In
read_from_stream, add .await at the end of the read_headers and
read_body calls, as these are now asynchronous functions.
In main.rs, you should swap std::net::{TcpListener, TcpStream} for
tokio::net::{TcpListener, TcpStream}, make main() async and add
#[tokio::main] on the line before it, and convert the request processing code
to be asynchronous. You may find the
TcpListener documentation
to be helpful. Any code you wrote in Milestone 1 will also need to be
converted. You should spawn Tokio tasks instead of spawning threads. If you
used a ThreadPool, you can remove it and spawn a task for each request; the
purpose of a ThreadPool is to reuse threads (which are expensive to spawn), but
Tokio tasks are lightweight and do not have this expense.
As you are working through this milestone, beware that Googling things may give
you outdated results. Rust introduced async/await syntax in 2017-2018 and
the feature was not released in stable Rust until November 2019, so we are
really working on the bleeding edge here. Tokio also underwent a significant
rewrite in early 2018, so any Tokio documentation prior to that is stale.
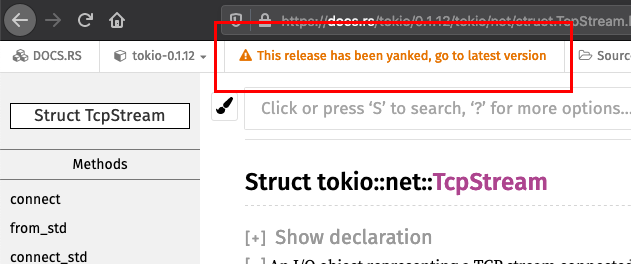
If you Google documentation, make sure to keep an eye on the upper left corner of the documentation pages and ensure you are on the latest version. Watch out for things like this:
Tip: If you get unexpected error messages with the word “future” in them,
chances are you forgot to .await on a function before using its return value.
(The compiler provides a helpful hint, even though the “found opaque type”
error may be confusing at first.) Example errors look like this:
error[E0308]: mismatched types
   --> tests/02_multiple_upstream_tests.rs:132:20
    |
132 |     upstreams.push(SimpleServer::new_at_address(failed_ip));
    |                    ^^^^^^^^^^^^^^^^^^^^^^^^^^^^^^^^^^^^^^^
    |                    |
    |                    expected struct `common::simple_server::SimpleServer`, found opaque type
    |                    help: consider using `.await` here: `SimpleServer::new_at_address(failed_ip).await`
    |
   ::: tests/common/simple_server.rs:46:62
    |
46  |     pub async fn new_at_address(bind_addr_string: String) -> SimpleServer {
    |                                                              ------------ the `Output` of this `async fn`'s found opaque type
    |
    = note:   expected struct `common::simple_server::SimpleServer`
            found opaque type `impl std::future::Future`
Again, at the end of this milestone, ensure the basic balancebeam features are still working:
cargo test --test 01_single_upstream_tests
cargo test --test 02_multiple_upstream_tests test_load_distribution
Milestone 3: Failover with passive health checks
At this point, your load balancer should be pretty scalable. Let’s work on adding some more availability to our infrastructure!
In this milestone, we will begin to implement failover: when one of the upstream servers fails, we should redirect its traffic to any remaining upstream servers so that clients experience minimal disruptions. Remember that when a client connects to balancebeam, balancebeam tries to connect to a random upstream server. We’ll first implement a simple mechanism for detecting when an upstream server has failed: if connecting to the upstream fails, we can assume that the upstream server is dead, and we can pick a different upstream server.
Modify your balancebeam implementation to keep track of dead upstream servers and to proxy clients only to the live upstreams. If a client connects and the first upstream balancebeam selects is dead, balancebeam should mark that upstream as dead and then pick a different upstream. Clients should only receive an error if all upstreams are dead.
You have several choices in how to track failed upstreams:
- You could use a mutex over some field in the ProxyState. The interface for Tokio’s Mutex is almost identical to the standard library’s.
- You could use a read-write lock instead of a mutex, so that tasks don’t block each other if they are all reading. (Only writers block.)
- You could have each thread maintain its own set of failed upstreams, and use channels so that a task can broadcast to every other task when an upstream fails. The channel in the async_std crate is an asynchronous version of crossbeam channels.
- These are the approaches we thought of, but there may be other good ones as well!
Again, each approach has different tradeoffs. For example, using a mutex may be the easiest to program, but will almost certainly create lock contention between tasks under load. Feel free to discuss tradeoffs on Slack and to pick any approach you like!
At the end of this milestone, you should pass the test_passive_health_checks
test:
cargo test passive_health_checks
You can run all of the tests up until this point using this command:
cargo test -- \
    --skip test_active_health_checks_check_http_status \
    --skip test_active_health_checks_restore_failed_upstream \
    --skip test_rate_limiting
Milestone 4: Failover with active health checks
Passive health checks are convenient, but they have limitations. Sometimes, servers fail in such a way that they can still establish connections, but they fail to service requests. For example, an application server might lose contact with the database server; it may establish initial connections with a client, but fails to process any request that relies on the database.
Application servers will commonly implement health check endpoints. A load balancer or service monitor (e.g. Github status) can make requests to these health check paths, and the server will do a quick self-test (e.g. doing some database operations) to make sure everything is functioning as expected. If the health check returns HTTP 200, the load balancer can be more confident that the upstream server is working, but if it returns something else, the load balancer can take it out of the rotation.
Performing periodic health checks also has the benefit that the load balancer can restore a failed upstream if it starts working again. An upstream server may temporarily go down if it gets overloaded or crashes or is rebooted, but the load balancer can periodically try making requests, and if the server starts responding successfully again, the upstream can start using it again.
In this milestone, you are to send a request to each upstream at
active_health_check_path every active_health_check_interval. If a failed
upstream returns HTTP 200, put it back in the rotation of upstream servers. If
an online upstream returns a non-200 status code, mark that server as failed.
As with previous milestones, there are several ways you can implement this functionality. Feel free to discuss!
At the end of this milestone, you should pass the
test_active_health_checks_restore_failed_upstream and
test_active_health_checks_check_http_status tests:
cargo test active_health_checks
You can run all of the tests up until this point using this command:
cargo test -- --skip test_rate_limiting
Tip: You can construct a request from scratch for some destination upstream
server and path using this code:
let request = http::Request::builder()
    .method(http::Method::GET)
    .uri(path)
    .header("Host", upstream)
    .body(Vec::new())
    .unwrap();
You can then use request::write_to_stream to send it to the server.
Milestone 5: Rate limiting
Rate limiting is the practice of limiting the rate at which clients can send requests. This can help prevent a service from being accidentally or intentionally overwhelmed. For example, a Denial of Service attack involves sending large amounts of traffic to a server in order to disable it; rate limiting can help by preventing large-volume attack traffic from reaching the application servers. Rate limiting is also used to prevent abuse, such as credential stuffing attacks, when an attacker attempts to brute-force guess usernames and passwords. Sometimes, rate limiting is even made part of a business model! For example, the Google Maps API allows other applications to make requests for maps information, but it charges per request and imposes limits on request rate per billing tier.
In this milestone, you will implement basic rate limiting by IP address. The
max_requests_per_minute parameter specifies how many requests each IP address
should be allowed to make per minute. (If it is zero, rate limiting should be
disabled.) If a client makes more requests within a minute, the proxy should
respond to those requests with HTTP error 429 (Too Many Requests) rather than
forwarding the requests to the upstream servers.
There are many algorithms for implementing rate limiting. This article provides a great overview. We recommend implementing the fixed window algorithm, but if you are up for something just slightly more complex, you can give the sliding window algorithm a try.
In the fixed window algorithm, the rate limiter tracks counters for each IP within a fixed time window (e.g. 12:00PM to 12:01PM). At the end of the window, the counters reset. This has the advantage of being extremely simple to implement. However, it is not the most accurate algorithm. To see why, imagine our rate limit is 100 requests/minute, and imagine a client sends 100 requests from 12:00:30 to 12:00:59, then sends another 100 requests from 12:01:00 to 12:01:30. Such a client would get away with sending 200 requests, which is double the rate limit, even though those requests are legal under this rate limiting scheme. The sliding window algorithm preserves the fixed window algorithm’s simplicity while being more accurate. However, for this assignment, implementing fixed window rate limiting will suffice.
You can run the test_rate_limiting test with this command:
cargo test rate_limiting
At the end of this milestone, all tests should pass!
cargo test
Tip: You can create a rate limiting error response like so:
let response = response::make_http_error(http::StatusCode::TOO_MANY_REQUESTS);
Then, you can use response::write_to_stream to send it to the client.
Reflection
When you finish, please write a brief reflection of your experience. You can
save this in a file in any common format, but make sure to add it to your git
repository so that it is included with your submission. (If you save
reflection.txt, do git add reflection.txt before committing.)
You can write anything you like, but here are some things we would love to hear about:
- What did you like about this assignment? What did you not like about it?
- Were there any parts you got stuck on?
- Were there any creative things you tried in order to improve performance?
- What did you learn?
Extensions
This assignment is quite open ended, and there are many more features you could implement. You’re welcome to take a look at HAProxy and Nginx to take inspiration from production load balancers. If you implement something new that is related to performance, feel free to talk to us about benchmarking, and we can suggest ways that you can benchmark and compare your implementation.
Here some features we feel would be particularly worthwhile:
Connection pooling
If you have the time, this might be one of the most interesting extra features to implement.
When a client connects to balancebeam, balancebeam must first establish a connection to an upstream before relaying the request. Establishing a connection is an expensive process that can double the time required to service a request in the worst cases.
A connection pool is a pool of open, ready-to-go upstream connections that a load balancer maintains in order to reduce request latency. (This is actually not a load balancing concept; for example, database clients almost always maintain a pool of connections to the database so that database queries can be executed with minimal latency.) When a request comes in, it is forwarded to an upstream over an idle connection in the pool. If there are no idle connections in the pool, the load balancer can fall back to opening a new connection, but this pooling reduces latency in the common case.
Better rate limiting
As mentioned, fixed window rate limiting isn’t the best strategy. Sliding window rate limiting provides significant improvements, and isn’t too hard to implement.
Also, if you are interested, this article from Cloudflare provides an overview of rate limiting at scale and explains how counters are maintained over a network of countless load balancers. (Cloudflare itself is essentially one massive, distributed load balancer.)
Other load balancing algorithms
The balancebeam starter code does random load balancing. This strategy is pretty effective and dead simple, but it degenerates under high load. Other strategies take into account how loaded each server is. There is a decent high-level summary of techniques here. Some of them depend on knowing the CPU load of each server, which is not possible with our setup, but techniques depending on the number of open connections are possible. This article also does a great job of exploring a hybrid algorithm called Power of Two Choices, and talks about benchmarking different algorithms.
Caching
A load balancer can also cache responses from application servers in order to reduce load on upstreams. Unlike the CS 110 proxy cache, this cache should be entirely in-memory in order to minimize latency. Since memory is a limited resource, you will want to implement policies for when data is evicted from the cache. You can depend on libraries if you like, such as lru.
Web Application Firewall
A WAF screens incoming requests, guessing whether a request seems to be malicious (e.g. an unusual request that seems intended to exploit a vulnerability on the application server, or an attempt at brute forcing credentials) and denying malicious traffic from reaching upstream servers. I didn’t find any WAF crates for Rust, but let us know if you would be interested in learning how to call into C++ code so that you can use the standard ModSecurity library for filtering.